• Portfolio
    • Illustration
    • Art Licensing
  • Books
    • Books
    • Activities
  • Visits and Talks
    • School Visits
    • Webinars & Workshops
  • Mentoring
  • Learn
    • Domestika Class
  • Blog
  • Contact
  • Subscribe
Marissa Valdez

Illustrator . Author . Daydream Expert

  • Portfolio
    • Illustration
    • Art Licensing
  • Books
    • Books
    • Activities
  • Visits and Talks
    • School Visits
    • Webinars & Workshops
  • Mentoring
  • Learn
    • Domestika Class
  • Blog
  • Contact
  • Subscribe

8 Tips for Conquering "Blank Page" Fear

Your pencils are sharpened. Your paper is down. You’re completely ready to start drawing but… nothing… comes… out. Dun dun duuun!

Does your mind ever go blank and you can’t bring yourself to make a mark on that nice clean sheet of paper in front of you? Maybe you can’t think of any “good” ideas? We’ve all been there. So how do you get over that fear of the blank page?

Collaged bird and leaves.

This topic popped into my mind because I recently had an experience with “blank page” fear. A couple months ago, I knew I needed to start sketches for a picture book but something was stopping me. I sat myself down in front of a stack of computer paper and tried to start. But nothing came out. No matter how hard I tried I JUST COULDN’T START DRAWING.

Blank paper anxiety hit me bad and in the moment it felt ridiculous. I knew I needed to draw, I even knew what I needed to draw, but I couldn’t start. My muses disappeared and they left my creative brain in a mess. At least clean up a bit, geez! But I realized that “blank page” fear doesn’t pop up out of nowhere: there was a reason (or in my case, reasons) for why I felt stuck.


After having a heart-to-heart with my very wise significant other, I identified a few reasons for my BPF (aka “Blank Page” Fear):
 

  • I was afraid to fail. This picture book project is close to my heart. The book is written by two amazing women who care about writing genuine and important books for children. And that scared me; I didn’t want to make something that didn’t live up to their amazing message.

  • There were 101 other things to do. I’m an illustrator and a business owner and BOY do I get busy. Not only am I often working on sketches, but I’m usually juggling 2 to 3 to 4 books at once. This is combined with marketing and social media, emails, classes, finances and a myriad of other minor tasks my brain is trying to focus on. The overwhelming feeling of having too many things on my plate can be debilitating.

  • I was tired. Sometimes, good ideas don’t flow if my brain is fried! A few months ago I creatively burnt out, but after some rest, a slower work schedule, and better planning, I was able to pull myself out. But diving headfirst into a new book felt like I’d be sinking into burn-out again.

Identifying why I was scared helped me work through the fear. And working through that fear lead to something amazing: finished sketches for a new picture book!

Snail going around berries and an acorn.

Figuring out what’s causing “blank page” fear is part of the process of conquering it, but if you’re still feeling unsure about drawing that first stroke in your sketchbook, here are some tips I use to overcome “blank page” fear: 

1. Write a list. 

I always keep my notebook close by to write down ideas. Ideas tend to come to me when I’m in the middle of doing something else; ideas like: “What if slugs took over the world?” or “What would a birthday party look like if only chickens were invited?” Instead of letting those ideas waft away into the universe, I take out my handy dandy notebook and write them down. This allows me to go back into that list at a later point and choose one of previous ideas to draw out when “blank page” fear strikes.

If you need to draw something on a specific subject, list out all of the aspects of that subject that interest you. I’ve found that the more you list the better! Skip a five point list and go write down a HUNDRED interests. I guarantee you’ll be excited to draw one of those things by the time you finish your list.

2. Set a timer.

Confession time: I’m a timer fanatic. Doing the dishes? I set a timer. Painting collage papers? I set a timer. Using the bathroom? You get the picture…

Give yourself fifteen minutes, an hour or two. See what you can draw within that time! When your time is up, acknowledge that you sat down, tried your best, and move forward with your next task.

Having a time to work on something also alleviates that “I have 101 other things to do” feeling and I’ve found that creating artwork in an allotted amount of time allows me to draw faster and looser than without the timer.

3. Give yourself a reward.

A good way to push myself to start a project is to offer a reward after I’m done. I’m more likely to work on a task that I might not want to do if I say, “When I draw 5 different versions of this book cover, I can play 30 minutes of video games”. Or “When I finish initial thumbnails for my next book, I can have a cookie and coffee after dinner”.

Choose whatever motivates you! I recommend giving yourself a reward that mirrors the size of your task as well. You don’t want to promise yourself a 4-week tropical vacation for finishing a few sketches because it’ll feel meaningless when you finish that REALLY big project. But you might reward yourself doing something you enjoy for an hour; for example, I’m going to reward myself by carving a pumpkin if I finish this blog post today. A few hours of blog writing = one hour of pumpkin carving!

4. Create drawing exercises. 

Sometimes my brain goes BLANK. During those times, a lighthouse could shine its light in my brain and there’d be nothing but fog and seaweed. And maybe cat photos. But that’s it.

Having go-to drawing exercises takes the indecision out of my “blank page” fear. Instead of sitting there, staring at your blank page and thinking “what should I create”, you already know! Anything that can help you go into a “drawing autopilot” is a good tool to have in your artist belt.

And guess what? You don’t have to think of your own drawing exercises! Here are some already existing exercises and challenges you can take advantage of:

  • Transmundane Tuesdays: a weekly drawing exercise run by illustrator, Carson Ellis.

  • Color Collective: A weekly challenge where you make work based on a single colour announced via twitter.

  • SCBWI’s Artober: an Inktober adjacent list of themes that you can use any time of the year.

  • Illustrating Children’s Books by Martin Ursell: a how-to book that is filled with kidlit-specific drawing exercises.

  • Making Comics by Lynda Barry: a mind-bending book filled with comic-specific drawing exercises.

5. Don’t be precious. Make trash art.

Perfectionism can be a creativity killer. My mantra lately is “you can’t make something perfect if you don’t make anything at all.”

So if I’m having a hard time getting something on the paper, I tell myself that I’m going to make X number of UGLY illustrations first. When the pressure of being perfect is taken off the table I find that I can create fun, imaginative work. Don’t get me wrong: I make ugly work too, but that’s part of the conquering process.

Give yourself the space to create something DISGUSTING.

6. Try using new materials. 

If you’re making something for a client, you’ll need to make a certain illustration, in a certain style, with certain colors most likely. You have to be specific about what you’re drawing, but sometimes I find those limitations daunting.

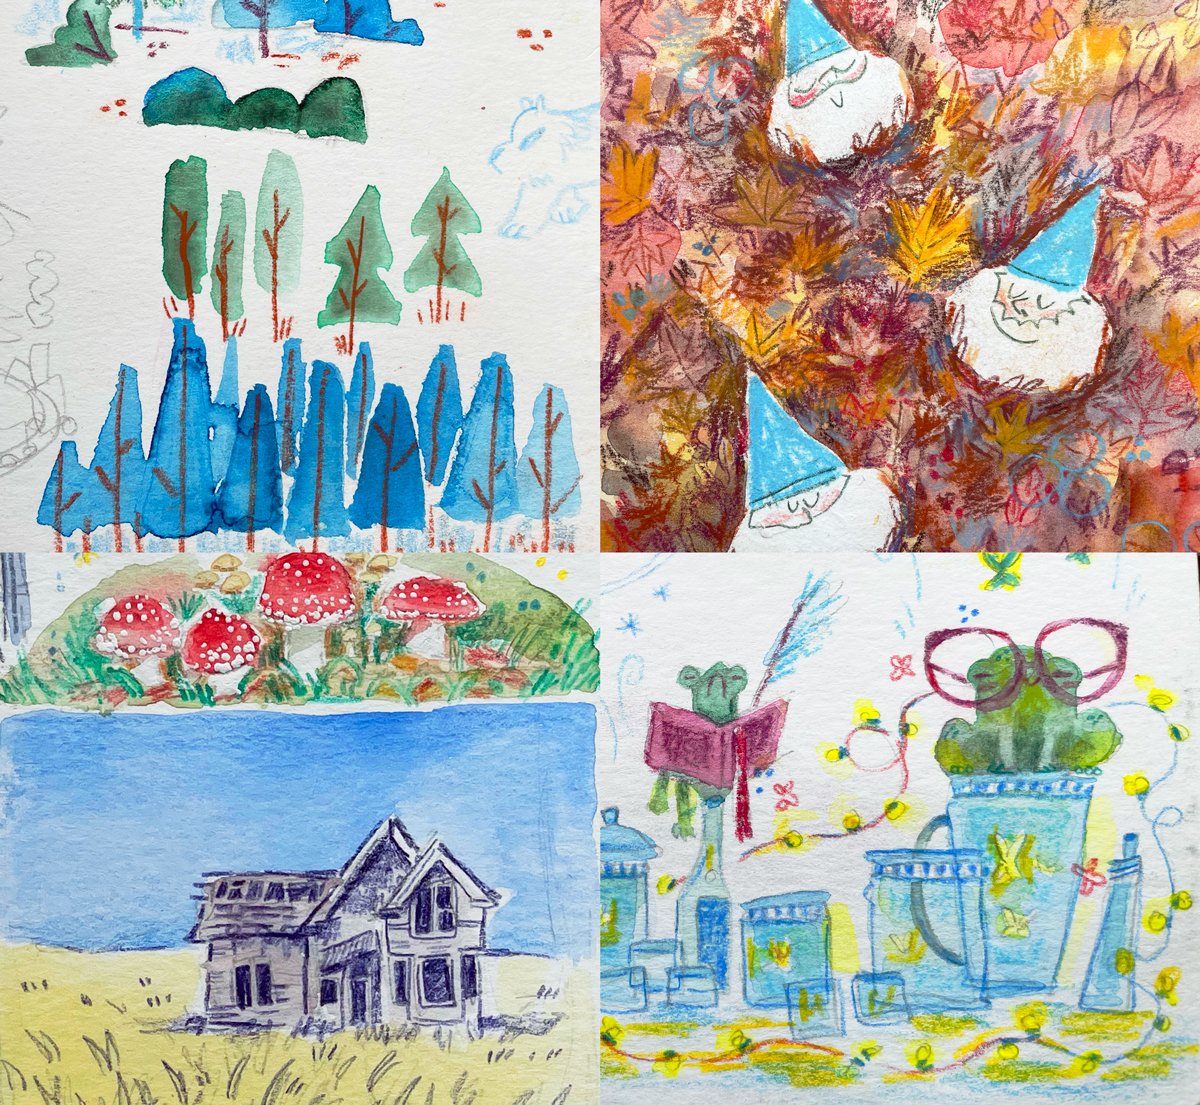
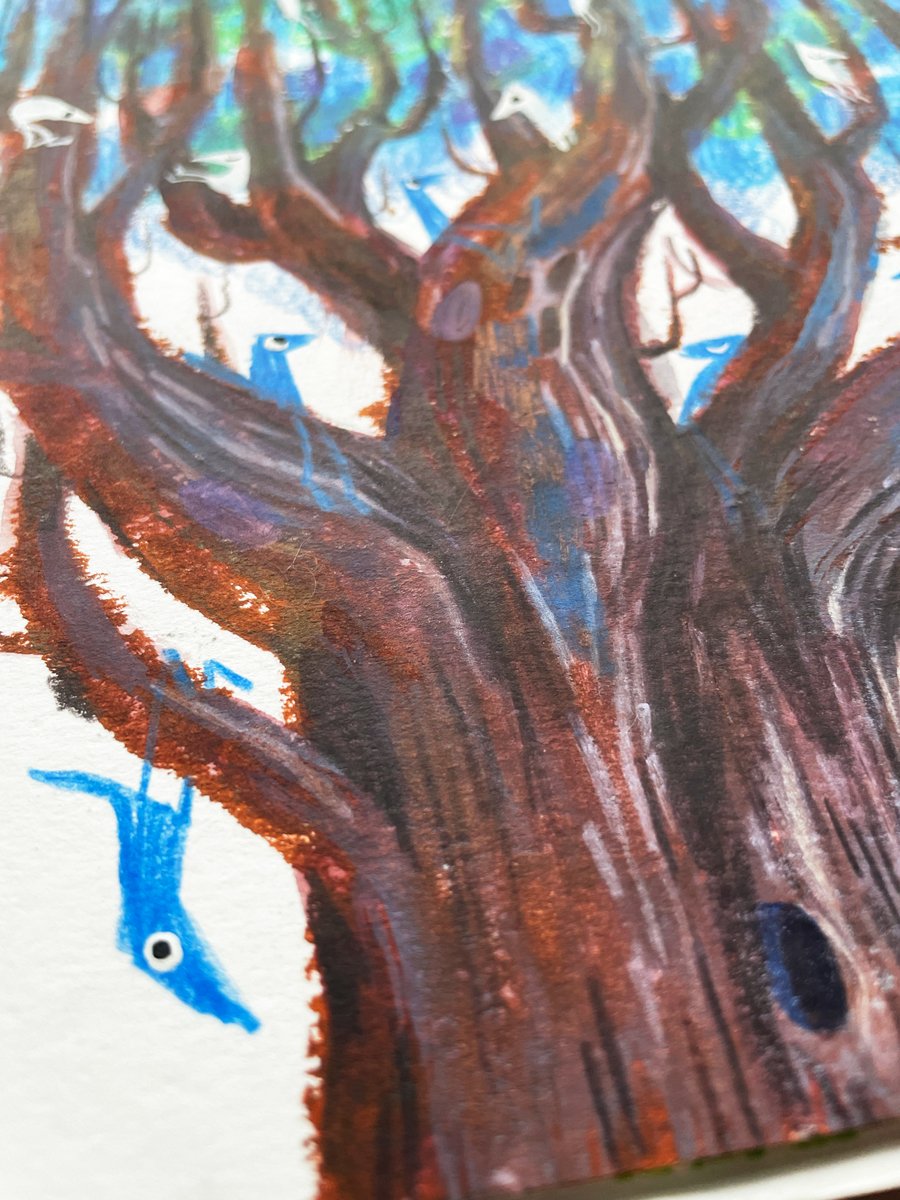
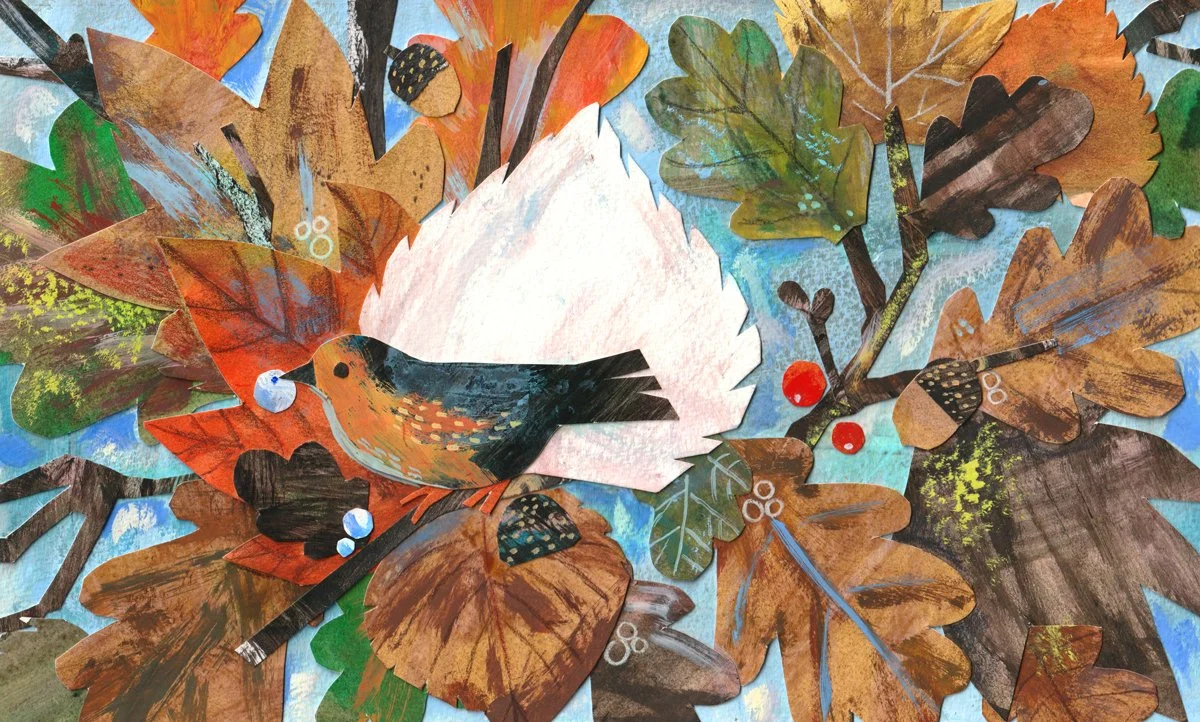
Try making something using materials you wouldn’t normally use first. My go-to is creating little collages with textured paper (like for the illustrations in this blog post!). Or try sculpting something. Heck, maybe even get wood-working tools out! Using different parts of your brain can open up creative channels that you wouldn’t normally have access to. After those channels are open, it’ll be easier to start working on that blank page.

A messy desk filled with paint and collage papers.

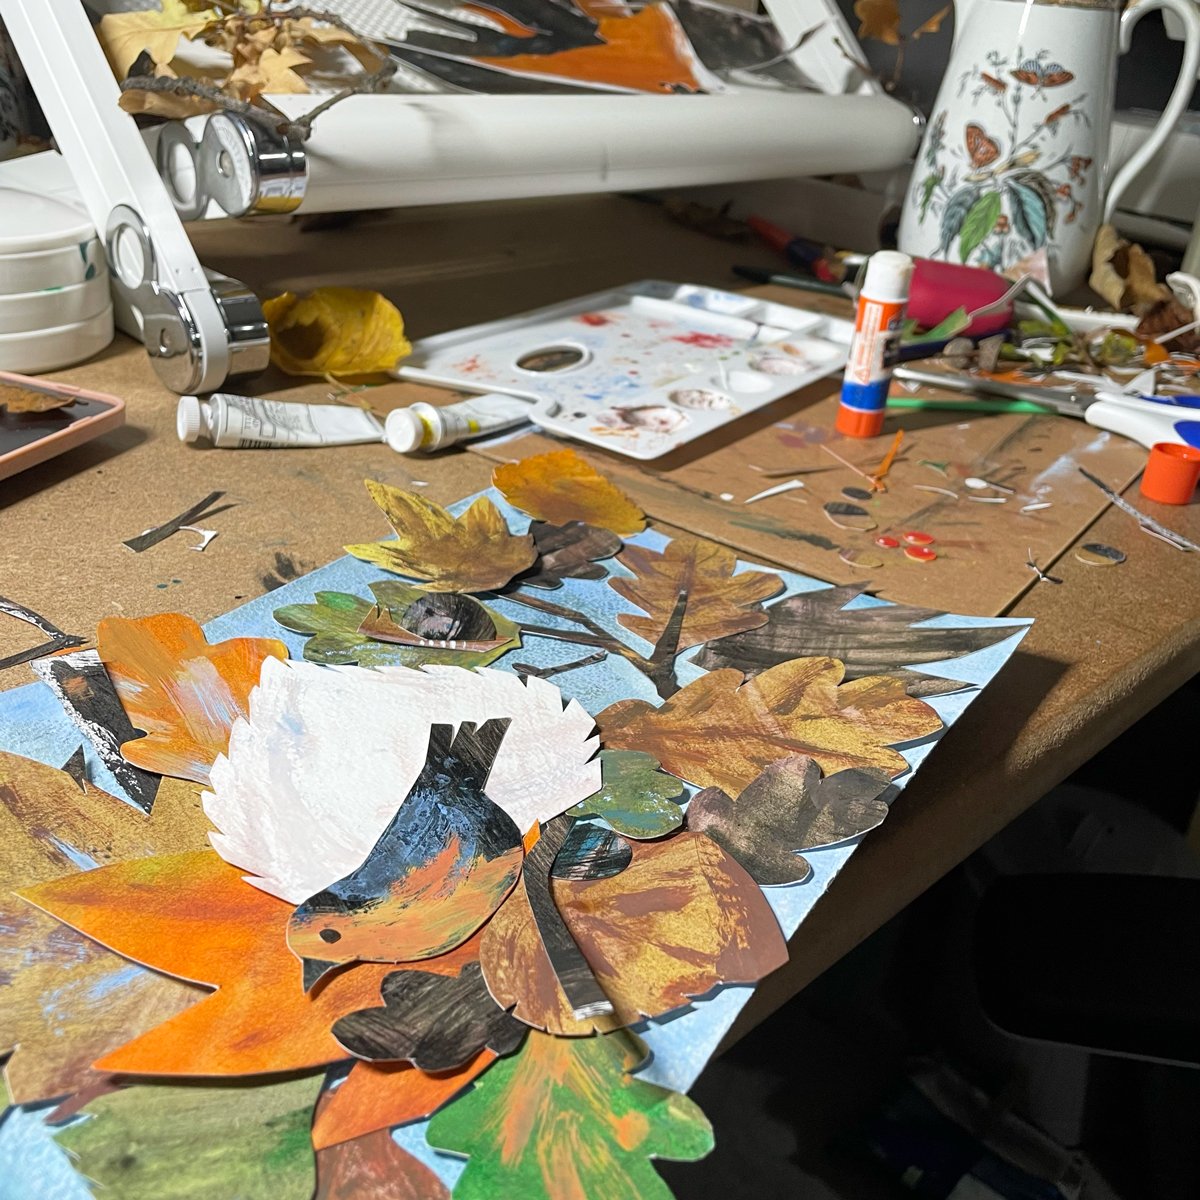
My messy desk after one of my collage sessions.

7. Keep yourself accountable. 

Nothing is more helpful to me than keeping myself accountable. When a deadline is looming, it can be stressful but also can kick me into gear and get me to start drawing.

Give yourself a personal deadline and mark it on your calendar. In red!

If personal deadlines don’t work for you (like for me…) tell a friend, family member, or whoever you trust, that you need to start and finish an illustration by a certain day. Their external expectation will encourage you to overcome that “blank page” fear because you can’t show someone your work if you never start it.

8. Take a break! 

If none of the above worked, take a break. We all can get to a point where we’re overworked and tired, and our brains just need to unwind. Do something you enjoy for 30 minutes and see if you feel charged and ready to tackle that blank page afterwards. If you have the time, sleep on it and try again refreshed and awake the next day.

Textured leaves and holly berries.

I hope these tips help you get over any “blank page” fear you might be feeling. Remember: it’s not something that you just need to get over once. It’s an ongoing challenge to be beaten over and over again. But when you have the right tools, “blank page” fear becomes a piece of cake to conquer!

Don’t be afraid of drawing that next thing, because whether or not it’s good, you created something out of a pile of raw materials. That’s practically magic, my friend.

Happy Autumn to all of you Northern-Hemisphere-artists out there, and happy Spring to all you Southern Hemispher-ians as well. Keep creating. I know you’ll make something great ❤️

Collaged image of a squirrel sleeping on a pile of leaves.

Hugs,
Marissa


Did you know that I send out book news, my inspirations, and book club recommendations through a monthly newsletter? Sign up below so you don’t miss out ✍️

Art Club Sign Up

Get updates, tutorials, thoughts and more via a monthly Art Club newsletter!

We respect your privacy.

Thank you!
tags: handmade, illustrator, illustration, childrens illustrator, children's book illustrator, art, art blog, picture book, picture book illustrator, sketchbook, collage, art tips
Tuesday 11.01.22
Posted by Marissa Valdez
 

Making the Book: Esme's Birthday Conga Line

Back in March of this year, I wrote in my newsletter that I would share how I created the illustrations for the first (and only) chapter book I’ve worked on: Esme’s Birthday Conga Line. I can FINALLY say that it’s here!

It’s the first time I’ve shared my book making process and I’ve had some nervous flutters about it. My sketches aren’t always the cleanest and my process can be messy, but this blog is all about sharing a more authentic me outside of social media. And what better way to do that than sharing both the good and the bad?? Even if that’s a little nerve-racking…

ESME’S BIRTHDAY CONGA LINE, written by Lourdes Heuer (check out her other great work here!) and published by Tundra Books. 

Esme lives with her grandparents on the uppermost floor of the topmost best building. It’s her birthday. Mimi and Pipo gave her a beautiful guitar. But they didn’t plan a birthday party.

Esme thinks this is the way with grandparents. They don’t know about parties or piñatas or birthday cake. No problem! Esme is great at problem solving.

With the help of her cat, El Toro, and a LOT of help from her neighbors in the topmost best building, the irrepressible Esme gets the birthday party of her dreams.

I first learned about Esme through my agent, who approached me with the story right after I signed on with her. When I read the manuscript, I was immediately entranced. A funny chapter book about a confident girl and her cat planning a birthday?? It’s like the author, Lourdes, knew EXACTLY what I was like as a kid and knew exactly what I would love to draw as an adult. I couldn’t wait to start sketching out this book!

But where did I actually start?

Research

This is always the hard part with books. Ideas are swirling around in your head, but you need to start making decisions about style, color, designs. It can be a little daunting knowing that you’re creating a whole WORLD for your story.

I started by reading the manuscript over and over again until I got a sense of what all the characters were like. At this point, I can usually see some form of the story drawn out in my head. After that, I began to research. My go-to research tool is a handy-dandy Pinterest board so I pinned scores of images of hispanic culture, senior citizens, apartment buildings, cityscapes, piñatas, cats, and matadors to an Esme specific board. Research is a pretty fun part of the process for me, especially when I can go down a few rabbit holes. And with experience, I’ve found that the more research you do up front, the faster the rest of the process becomes.

Here you can see pins for fabric used by Esme’s seamstress neighbor. I find that if you work off of real objects and locations for props and backgrounds, the more believable they end up looking in your final illustrations.

After that, I created a mood-board (see image below) that I sent to our editor and art director. This one was especially simple, but having a visual representation of what you want the book to feel like can help the editor and art director understand your overall vision. It’s a quick thing to create and it’s great to look back at when you’re working on the book to make sure you’re sticking to the proposed mood too.

Character Designs

Oh the characters! Outfits, hairstyles, TURNAROUNDS. Creating characters is my favorite part of the process! When I first envisioned Esme, I saw her being a small but spunky Latina girl. While Lourdes wrote SO MUCH of Esme’s personality into the manuscript, she never really specified what Esme looked like or what her heritage was. Other than Esme having glasses and knowing that her favorite color was green, everything else was up to me. Because I’m from Mexican heritage, I wanted to mirror that part of me with Esme. A lot of creating characters, in my experience, is finding that aspect of yourself that you can give to the characters to flesh them out.

Different versions of Esme and her cat, El Toro (who ended up looking a lot like my cat…).

I think drawing from your own experiences and personality adds a fullness to the character that would be hard to achieve otherwise.

With Esme, I mirrored my heritage, my somewhat bushy eyebrows, and the frizzy hair I had as a kid. But don’t be fooled: I didn’t draw her perfectly the first time. Esme went through MANY design iterations. At one point she had big fluffy pigtails, she donned a tutu at another, I even gave her a pug nose which I eventually axed in the end.

This book ended up being a character development BEAST. There are fourteen characters in total and I wanted to make sure that each character matched Esme’s style but was also completely distinctive in their own way. Lourdes had created characters with such unique personalities anyway so it wasn’t too difficult to make each character look distinct and interesting in the sketches. Drawing out scenes with fourteen characters WAS a little time consuming though!

A couple of my favorite characters are El Toro, who originally had a luchador mask design on his face (check out the image above), the Garcia Twins who are 100% modeled after the twins from The Shining and the Mora sisters, who had the coolest apartment in the world to draw.

After creating a character sheet, I sent the finalized sketches of Esme, El Toro and the rest of the gang to our editor who shared them with the art director and Lourdes. I received some feedback and with a few tweaks we decided on the dot eye version of Esme with a ponytail. Surprisingly, Lourdes asked if we could change Esme’s outfit to a pair of pink overalls, which I LOVED. Lourdes must be a mind reader, because I had initially thought of putting Esme in a pair of overalls, but, at the last minute, decided that might be a little too average looking. Stick with your gut, friends!

Thumbnails and Sketches

Esme was especially fun to draw sketches for because the manuscript was so funny but roomy enough that I felt like I could add in my humor to the story as well.

I started the sketches when the AD, John, sent over page layouts that included the text. These outlined, on each page, where I needed to place my illustrations in coordination with the text. I printed the page layouts at about 20% of their normal size out onto paper and started drawing VERY sketchy initial thumbnails with pencil. I’m talking shapes and scribbles, people. Nothing fancy!

I printed the layouts small because I think thumbnails are just that: thumb size. Starting out teeny tiny is great because I can focus on composition, bigger shapes, and flow lines instead of worrying about the smaller details. This definitely doesn’t always happen but it’s incredible looking back on the sketches and seeing how closely the finals actually mirrored the thumbnails.

After that initial pass at the thumbnails, I cleaned them up to a state where they were readable enough to send to the editor. Like I mentioned earlier, I’m a pretty messy sketcher, so I have to go through several passes to get my sketches at a stage where objects and characters actually look IDENTIFIABLE.

I mean, look at this thing! What is it? Some sort of spider? Is that cat flying in the air in the background??

After sketches were sent to the editor, I was sent feedback about potential revisions. There were a couple places where the sketches needed to be revised (usually in spots where I made the scene a little TOO ridiculous, like in the sketch below) but most images stayed as is from the original thumbnails. Little to no revisions don’t always happen but let me tell you, when it does it FEELS GREAT!

Can we get a “bwahaha” in here??

Color Palette

Color is not something that comes naturally to me, so choosing a color palette for Esme was a challenge. I created a few initial color studies but it felt like nothing was gelling until I received an email from the editor and Lourdes.

“Could we incorporate a Cuban color palette into the illustrations?”

Uh, OF COURSE WE COULD. I immediately started looking at Cuban buildings and fashion and saw that Cuba is wonderfully pastel. Voila! Lightbulb moment! Eureka! My issues with the color palette were solved. When I started using pastel pinks, greens, blues and yellows, everything made sense. This is a textbook example of how collaboration can lead to MAGIC. And if you’re illustrating books, there’s a good chance you’re most likely a fan of working with other people anyway.

View fullsize BlogPost6-ColorStudy-1.jpg
View fullsize BlogPost6-ColorStudy-2.jpg
View fullsize BlogPost6-ColorStudy-3.jpg
View fullsize BlogPost6-ColorStudy-4.jpg

Finals

FINALS. Oh, finals. Unlike character designs, finals are NOT my favorite part of the process. You might call this the bad that I was talking about earlier… Finishing art is a long and physically demanding task for me, especially because my process includes drawing on a lot of layers and drawing in a lot of tiny details. This is when I put my head down, put on a good podcast or audio book and just draw, pretty robotically, for 8 to 12 (sometimes 16…) hours a day.

Some pages were harder to finish than others and, at times, I would find myself starting to doubt whether the illustrations looked good or not. But the wonderful thing about Esme and El Toro was that I was always entertained. Every time I was in a rush to finish a page, a witty joke that Lourdes wrote would make me laugh and brighten my day.

In the end it took me about two months to finish the forty spreads, and when I finished, I was really proud of what I had created.

I finished the illustrations for Esme in Procreate, using watercolor brushes for the base colors and a chalk brush for details, with some handmade textures sprinkled in at the end. The nice thing was that I had already done work figuring out the colors for each page, so that made the finals just that much easier to work through. Some books have stricter time limitations so I’m not always able to create color studies, but when I do, it makes the whole process that much easier! It’s something I now strive to do for every book.

Sketches to finals for one funky conga line illustration.

From there, I received proofs in the mail and looked them over. The proofs at first looked pretty desaturated partially because the printer printed them out that way and partially because I wasn’t great at not using CMYK friendly colors at that time. I’ve learned since then! After some lovely tweaking by the art director, I was sent another round of proofs that looked PERFECT. Praise all the art directors out there! Unfortunately, I had to leave all my proofs behind when I moved overseas so I don’t have any pictures of them to show in this post.

(Just imagine me in a lofty, Victorian library surrounded by large sheets of glossy paper filled with swirling images of piñatas, cats, and elevator fires, thoughtfully stroking my chin and smoking a pipe while looking at the proofs. That’s not what it was like AT ALL but that sounds pretty cool, right?)

Once the proofs were approved I had the wonderful pleasure of receiving my illustrator copies of Esme’s Birthday Conga Line in the mail! WOOOO!! There’s nothing more exciting than holding the real-life book that you helped create.

View fullsize BlogPost6-Finishedbook-4.jpg
View fullsize BlogPost6-Finishedbook-3.jpg

Any insecurities I may have about my illustrations all go away when I flip through pages of the final book. There’s something mesmerizing about seeing the art-directed-text on the page with your illustrations. You spend so much time working on the art that it’s easy to forget see how the text is going to coordinate with your illustrations on the finished pages. It’s magic when you see everything together! One of the things that makes children’s books so great in my opinion.

And that’s it!

An in-depth overview of how I created the illustrations for one of my favorite books of all time, Esme’s Birthday Conga Line, written by Lourdes Heuer and published by Tundra Books. I hope this blog post helped reveal any mystery about illustrating books as well; it’s a process that differs from artist to artist and it can take a long time, but it’s not impossible and if you’re trying to make a book now, you can do it! Even if the process gets a little messy.

Esme’s Birthday Conga Line is out now! If you liked what you saw in this blog post, you can grab the book at your local independent bookstore, at your local library, or through Amazon.

Thanks for sticking around, hope you have a very spooky Halloween. Can’t wait to talk to you more next month ❤️


Hugs,
Marissa (and Esme!)

Art Club Sign Up

Get updates, tutorials, thoughts and more via a monthly Art Club newsletter!

We respect your privacy.

Thank you!
tags: handmade, illustrator, illustration, childrens illustrator, children's book illustrator, art, art blog, art tutorial, picture book, picture book illustrator, sketchbook
Saturday 10.01.22
Posted by Marissa Valdez
 

A Quick Life Update

Life Update

What’s happening, friends?

This blog was supposed to be a monthly thing but as we all know, things don’t always go as planned. After a break from the blog and social media, I’m excited to share what I’ve been up to!

Tea cakes and a goose I saw in the park. Painted in gouache with washi tape collage.

Tea cakes and a goose I saw in the park. Painted in gouache with washi tape collage.

Big British News! I’ve made the permanent move to the UK: Birmingham, England to be exact.

I’m originally from Texas, USA but after meeting my wonderful English husband and getting married, we took the plunge and moved to the UK permanently. It was scary to think that I’d be in a totally different place but I’m adapting to my new country fast. In a weird way, it kind of feels like this has always been the home for me. 

View fullsize  Paintings on a yellow wall.
View fullsize  Cathedral in the sunlight in Bath.
View fullsize  Large antique black boat against a blue sky.
View fullsize  Two stuffed Natterer’s bats in a glass case.

A few things I’ve seen in England so far: Horrible Histories book covers from a Martin Brown exhibit, beautiful architecture in Bath, an 18th century metal cruising ship in Bristol, and some stuffed Natterer’s Bats at the natural history museum (these might be my favorite kind of bat now…).

This year has already been such a whirlwind. Getting married, moving to a new country, books coming out and more. My two cats, Baby and Chica, even traveled over the Atlantic to be at home with us in England. Did you know that pets have accents from their own countries? The vet swears my cats still sound American…


Thoughts about a picture book workload.

The last couple months, I was in a mad dash to finish two more picture books. They’re finished now and I love how they turned out, but books can take a LONG time to finish. Sometimes the whole process can take six months to a year from start to finish and it can become grueling.

The part of the process that always gets me is finishing finals. I tend to lock myself away in my office, most likely in pajama pants with a good podcast or Star Trek on in the background, and I just double down on finishing artwork on my Ipad. Unlike the sketching phase, finishing artwork doesn’t take as much brainpower but it is a LOT of physical work.

Spending almost every waking hour drawing? You may think, Marissa, that sounds like heaven! But sometimes it can be really draining.

I was probably drinking too much coffee in a day, I sometimes forgot what the outside world looked like, and I definitely didn’t stretch enough. At points, I began thinking to myself, what does a good picture book even look like? There’s even the occasional thought of giving up. But I think most children’s book illustrators go through this at one point or another. You find that it’s always is worth it in the end when you feel that finished book in your hands.

So my final thoughts on finishing those two books: making books can mean long hours, hurt shoulders, and bags under your eyes, but I wouldn’t change it for the world.


View fullsize  Marissa holding the book, Esme’s Birthday Conga Line and laughing.
View fullsize  Illustration of Esme holding her guitar with El Toro, her cat, next to her.
View fullsize  A picture of a scene from Esme’s Birthday Conga Line in the book on the top and a sketch of the same scene on the bottom.
View fullsize  Illustration of Esme peeking into a room filled with plants, and sewing supplies.

Esme’s Birthday Conga Line came out on May 10th!

Pull the confetti cannons and smash the piñatas, Esme and her trusty cat sidekick are out in the world! I’m sure you’ve heard me talk about this book because I can’t stop thinking about it. And I can gladly say that Lourdes, the author, and I are not the only ones who love it. Esme now has some great book reviews out in the world, like this one:

Organized into 12 short chapters, the playful text features zippy dialogue, bullet-pointed lists, and plenty of pleasing repetition for beginning readers. Valdez’s colourful, animated cartoon illustrations extend the celebratory fun and offer a peek inside apartments on each floor of the “topmost best building.” Like the best bashes, this early-reader series debut is amusing and inviting.— Linda Ludke, Booklist

All that being said, I wish I had a little more time to celebrate this book on its debut day. In my head, I was planning on flying to Florida to surprise Lourdes with piñatas and cakes with Esme’s face on them and hand-sewn plushies of Esme’s cat, El Toro.

But life gets in the way! And I’m trying to celebrate this book as much as I can NOW even if I couldn’t on it’s release day.

Who knows, maybe I’ll fly over to Florida one day? Maybe I can make a cake at home for an Esme Halloween extravaganza? I DID get to make Lourdes an Esme style piñata which you can see on her instagram here. Even if I didn’t get to hand it to her in person, it still felt nice to show her how special Esme is in a small way. AND I’d love to make a how-to sheet on making your own Esme-inspired-piñata in the future! I’m realizing that there’s no expiration date for a celebration.

If you want to celebrate Esme too, grab it from your local bookstore or check it out at your local library if you can!

P.S. If you do see Esme and El Toro out in the real world, don’t forget to tag me and Lourdes (@marissaarts and @lourdesheuer) on insta so we can share in the Esme love ❤️


Hattie Harmony: Worry Detective debuted as #1 New York Times bestseller 🤯

Hattie Harmony, written by Elizabeth Olsen and Robbie Arnett, published by Viking Books, totally blew my expectations wide open by debuting as a #1 New York Times Bestselling children’s book! Incredibly, this means that I’ve gotten, as an illustrator, a number one spot on the New York Times bestseller list TWICE. I have to admit that I feel completely strange tooting my own horn so hard. Hello, imposter syndrome vibes…

But at the same time, I’m so incredibly proud of this book. The team at Viking, our editor Tamar Brazis and our art director, Jim Hoover, knocked it out of the park with being kind, patient, and understanding throughout the whole bookmaking process. It’s wonderful to see Hattie and the entire Hattie team getting some good ol’ praise.


If you’d like a copy of Hattie Harmony, grab it from your local bookstore using this link or check it out at your local library if you can! Libraries are great!


Hand drawn image of the Domestika banner.

My Domestika course: Creating a Children’s Illustration Portfolio.

Take a peek at it using this link. I’m pretty sure I’ve mentioned this class a few times in my newsletter but it officially came out in early May.

Honestly ya’ll, creating this course was a challenge. I had never created a class in such depth; in fact, I had never created ANY class for illustration before! When the good people at Domestika initially contacted me about creating a course with them, my initial thought was “NO WAY”. But my mantra for the past couple of years has been “take risks” and this felt like one great big, fun risk.

It took around six months to create the syllabus, class workflow, course examples, and four intense days shooting on set with the New York Domestika crew to film the four hour long course. As an example for the class videos, I created a new picture book character, Francis-stein. Unexpectedly, I fell in love with her and her story so much that I plan on creating a Francis-stein book in the future! Unexpected things like that tend to happen with art, don’t they?

Image of Marissa drawing Francis-stein on an Ipad for Domestika.

The whole process took a lot of time, but it was completely worth it. I remember when I first started off in the children’s illustration world. IT. WAS. SCARY! I didn’t know where to find information to help me down my new career path. I finally found my way through podcasts, SCBWI, and social media but it was always hard figuring out where to go next.

So being able to provide ANY useful info, tips, or encouragement for artists starting out in this is industry feels like my duty. And as illustrators, we never stop growing; I’m constantly learning something from other artists in and out of the children’s book industry.

Let me know if you’d be interested in hearing more about the process of creating a Domestika course in the comments. It was a lot of fun, and like I said before, I want to share what I’ve learned.

If you’re interested in either taking this course or gifting it to a friend, use this link here to sign up and take 15% off the course with the promo code: MARISSAARTS-KIDLITPB. (expires 09/26/2022) Thanks!


I had fun painting this snail in gouache and collaging the pencil, snail’s shell, and accents with kraft paper and washi tape.

It feels like sometimes things are going too fast and I’m happy things are finally slowing down so I can take in more of the world. Happily, I’ve found time to spend experimenting with my artwork (like the paintings in this blog!) while still making time for hobbies and my family.

I bless these slower times but I don’t think I’d be happy without the fast times as well. We’ll see what the future holds!

Lovely to get back into blogging again and I’ll make sure to keep all of you lovely people up-to-date. Hope your life has been fast, slow, or in between, whatever you’ve needed it to be ❤️

Me on a beach in the UK flabbergasted by donkey rides!


Hugs,
Marissa

Art Club Sign Up

Get updates, tutorials, thoughts and more via a monthly Art Club newsletter!

We respect your privacy.

Thank you!
tags: illustrator, illustration, childrens illustrator, children's book illustrator, art, art blog, art tutorial, picture book, picture book illustrator, sketchbook
Thursday 09.01.22
Posted by Marissa Valdez
Comments: 1
 

Sketchbook Tour #1

Three different variations of the words "Sketch Book Tour #1".

*some sketchy sketches for the sketch book title in this sketchbook post

I thought I’d make this month’s blog post a little different and give ya’ll a sneak peek into one of my sketchbooks for this blog’s first iteration of a sketchbook tour!

Sketchbook Tour: Why am I doing this?

I’ve always kept my sketchbooks very close to my heart; I rarely show them off and I recently haven’t been sharing my sketchy drawings on social media at all. It made me think: do I treat my rough, scribbly, scrobbly sketches TOO preciously? Am I scared of what people will think of my rough work?

When I was brainstorming ideas for blog posts, I made the decision to put myself out there and do something that felt a little strange: dedicating a whole series to sharing the inner pages of my sketchbooks. Let’s get vulnerable!

A sketch showing two long crazy dogs and three tiny creatures with wings.

*a few random sketches that fell out of my head.

I’ll be outlining what kind of sketchbook I worked in, what materials I used, what intention I had for the sketchbook and what I learned from actually finishing the sketchbook! (Which, trust me, I have A LOT of unfinished sketchbooks…)

A stack of sketchbooks.

I’m also planning on this post to be the tiniest kick in the butt for me to draw in my sketchbooks more! Blank page anxiety is a real thing, ya’ll. 

View fullsize IMG_5410-2.jpg
View fullsize IMG_5412-2.jpg
View fullsize IMG_5446.jpg
View fullsize IMG_5436-2.jpg

Sketchbook #1

View fullsize IMG_5464.jpg
View fullsize IMG_5470.jpg
View fullsize IMG_5478.jpg
View fullsize IMG_5482.jpg
  • What kind of sketchbook is this? Oh nelly, I chose this book for the first sketchbook tour because it’s my favorite! I hand sewed this one with smooth white Bristol paper and regular sewing thread.

    I am not a seasoned book maker but my friend Meghan showed me a sketchbook she made herself and I fell in LOVE with it! She used high quality paper for it and it just felt great to hold in my hands. Ya’ll, there was some real sketchbook jealousy happening. So I just had to make own!

    I think everyone has a preference about their sketchbook size: my preference is smaller. I made this book so that it was 5x7 inches, which ended up being perfect. I know if I have smaller sized pages, I’m more likely to actually fill the page. If I only ever worked in 5x7 sketchbooks, I would be very happy! What’s your preference?

P.S. If you’re looking into making your own sketchbook, I recommend watching Sea Lemon’s tutorial on Kettle stitching: It’s what I used to create this sketchbook and few more after this one. It’s great for beginners!

This sketchbook was actually my first venture into hand stitching and woah, I got SO hooked to it!

If I could make ALL of my sketchbooks I definitely would. While I loved the process, my hand stitching wasn’t the best so I hid my stitching by pasting some rough pink paper I made during my papermaking phase onto the covers and spine of the book. I’m pretty happy with the result and every time I look at my sketchbook I’m reminded that I saved some paper from being thrown in the trash. Definitely a win-win!

I LOVE this sketchbook, but it was also a lot of work. Doing this is certainly a labor of love!

  • What kind of materials did I use in this sketchbook? Lots of watercolor, brush pens, dip ink pens, colored pencils, paper collage and oh so more. I can’t remember everything but there was lots of fun stuff to work with!

    I felt open to using ALL the materials for this sketchbook and I’m really happy with the result. I wasn’t afraid to just try stuff out: I slapped down watercolor, I gouach-ed the heck out of pages and I used my fancy dip pen nibs A LOT. It was fun and really encouraging to use mediums that I may normally be a little hesitant to try out. I found out that I really want to work with dip pens more and I’m even trying to incorporate it in my professional work now.

    In fact, I made the dividers for this blog using that same dip pen!

An ink sketch of a page divider with delicate leaves.
View fullsize IMG_5508.jpg
View fullsize IMG_5507.jpg
View fullsize IMG_5517.jpg
View fullsize IMG_5521.jpg
  • What was my intention for this sketchbook? The intention of this sketchbook was to draw as much as possible! When I made this sketchbook, I told myself that I would draw something substantial in it at least once a week. I may have even said once a day?? The main goal was to draw and paint something in it as often as possible.

Before I even started drawing in this book, I also told myself that I would FILL the pages with art. And that meant good or bad art! Whatever came, as long as the pages were filled top to bottom.

Ink sketch of a sun face with starbursts surrounding it.

Setting that intention allowed me to focus on why I was drawing instead of what I was drawing. I wasn’t scared about drawing or making something bad or worried about being too scribbly because I knew what my overall goal for the book was before I even started.

For some people, having a sketchbook where you don’t think about what you’re going to make ahead of time can be a great thing, but I thrive with structure.

I’ll definitely be thinking of my intention for my other sketchbooks before I start working on them! If you’re like me and you crave structure, set an intention for your sketchbook and share it with me! I’d love to hear what you come up with.

And know this: not all of my sketchbooks are as polished as this one; I often include waaaaay more writing and chicken-scratch-esque sketches in my sketchbooks. You’ll hopefully get to see all that in the next sketchbook tour :)

View fullsize IMG_5708.jpg
View fullsize IMG_5714.jpg
View fullsize IMG_5722.jpg
View fullsize IMG_5727.jpg
An ink sketch of an adorable screeching cat.
  • What did I learn from finishing this sketchbook? You can fill up a sketchbook REALLY quickly when you set your mind to it. I also learned that playing around with full colored sketches is really fun. When I was younger, my sketchbooks were usually only in black and white because I felt like color was reserved for finished pieces only.

I also learned that I had A LOT OF FUN trying stuff out in this book and I can’t wait to finish another one.

An ink sketch of a page divider with delicate leaves.

I’m not saying everyone should share everything they make in their sketchbook. An artist’s sketchbook can be a wonderfully personal thing but I love it when I can see into the working mind of other artists. This is my way to give my working mind to the children’s book community while also getting over my fear of sharing!

Thanks friends! Until next time (with another finished sketchbook) ❤️


Hugs,
Marissa

A really messy and inky sketch of a young girl running.

*a super sketchy sketch that I love!

Art Club Sign Up

Get updates, tutorials, thoughts and more via a monthly Art Club newsletter!

We respect your privacy.

Thank you!
tags: handmade, illustrator, illustration, childrens illustrator, children's book illustrator, art, art blog, art tutorial, picture book, picture book illustrator, sketchbook
Thursday 03.31.22
Posted by Marissa Valdez
 

All images © Marissa Valdez 2024